How to customise your solution layout
A how-to guide for creating custom layouts for your solution
Introduction
Would you like to customise your solution layout? Then configure the layout by following these steps.
Prerequisites
- You configured the frames and routes for your solution.
- You configured the relevant contents such as the model(s), control panel(s), viewer(s) and datastore.
1. Configure the layout
- Add the
layoutentity to your frame(s). - To set the layout, you can use:
kind: ColumnLayoutto divide and organise the frame into columns. See the columnLayout.kind: RowLayoutto divide and organise the frame into rows. See the rowLayout.kind: GridLayoutto organise the frame with both columns and rows. See the gridLayout schema docs.
- Define the names of
areaswithin the layout. These names should match the names of the contents in your frame. - Define the sizes of columns and/or rows. See the possible grid sizes.
The configuration should look similar to the example below:
my-frame:
kind: Frame
layout:
kind: GridLayout
widths:
- [2fr,1fr]
heights:
- 1fr
- 1fr
areas:
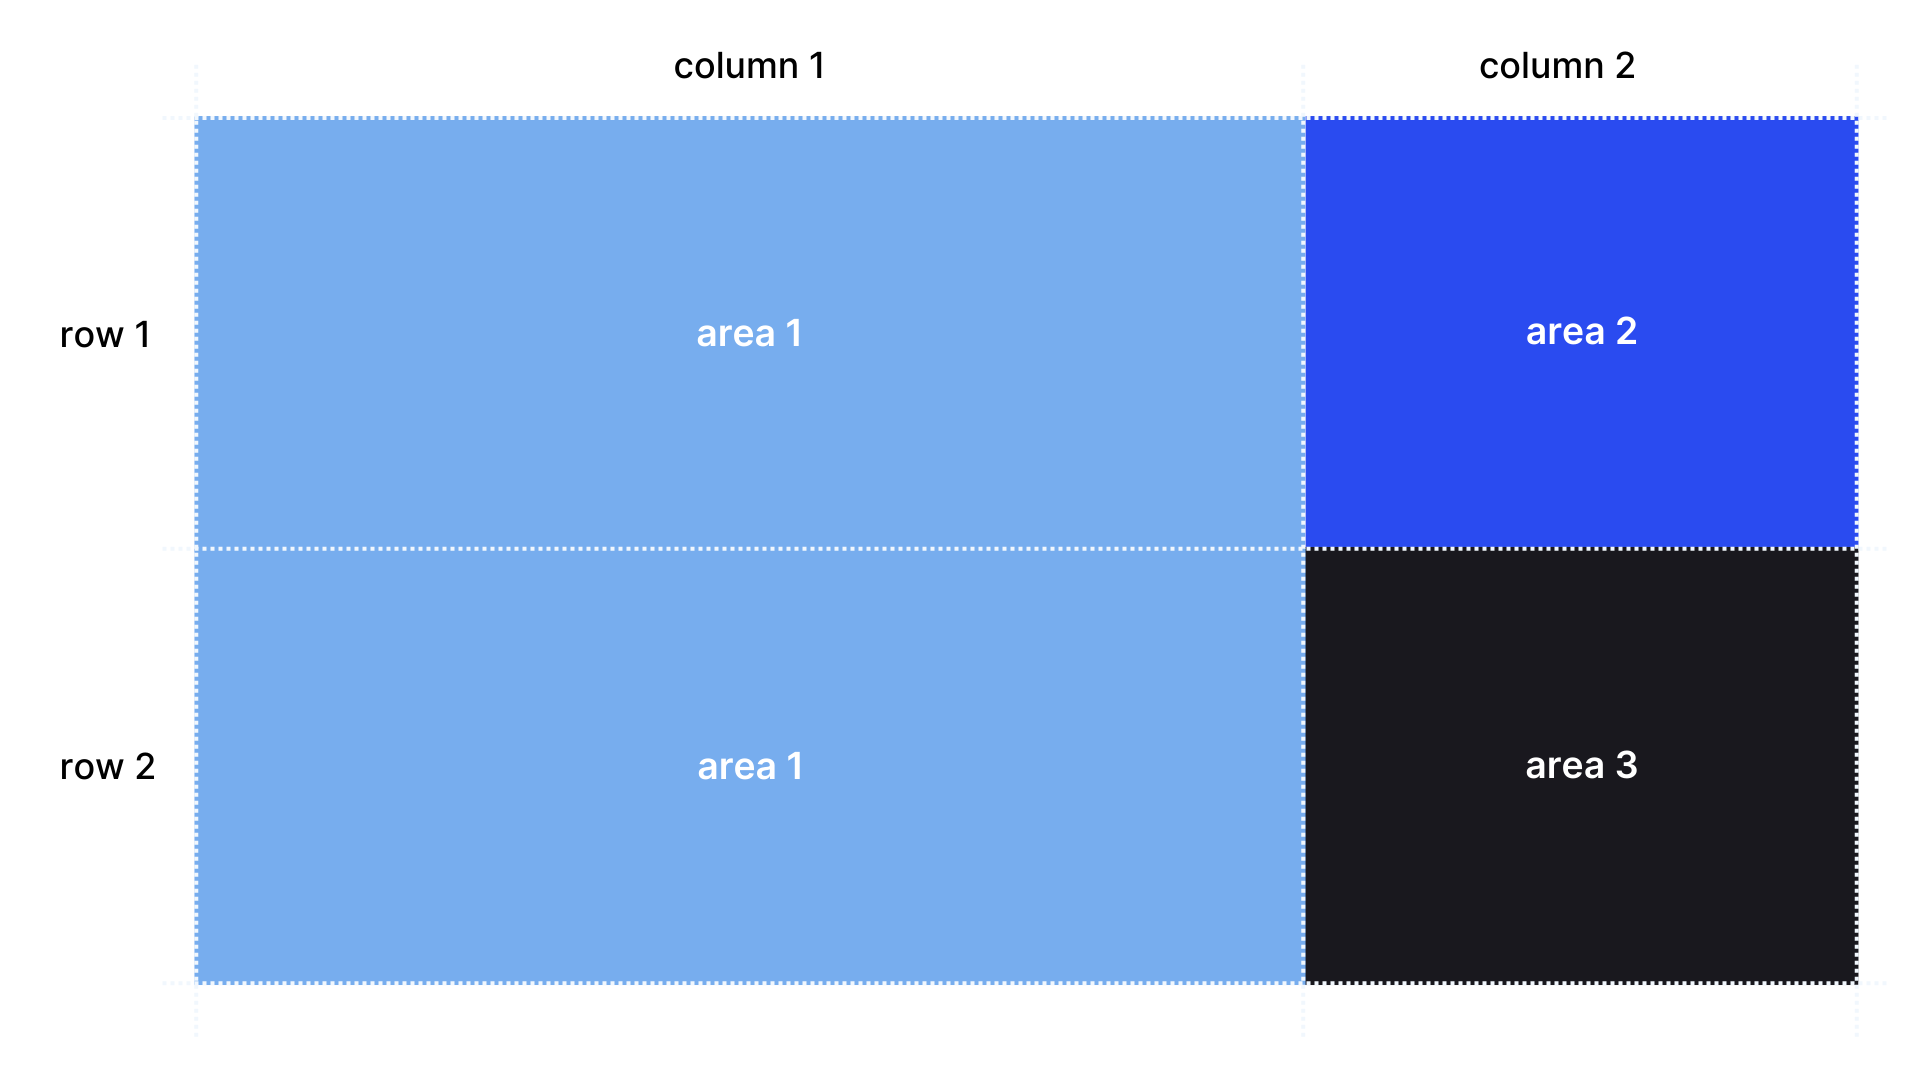
- [area1, area2]
- [area1, area3]
The configuration above would result in a layout similar to the image below:
2. Optionally add overlay areas
To display contents on top of other contents, add overlay areas to your grid layouts.
- Define the overlaying content in each row and column.
- Use
""for areas without overlaying content.
❗ The areas and overlay areas need to have the same structure of columns and rows.
The configuration should look similar to the example below:
  my-frame:
    kind: Frame
    layout:
      kind: GridLayout
      widths:
        - [2fr,1fr]
      heights:
        - 1fr
        - 1fr
      areas:
        - [area1, area2]
        - [area1, area3]
      overlayAreas:
        - ["", ""]
        - [area4, area4]
Schema
See the layout schema docs for more information.