How to add conditional controls to your solution
A how-to guide for adding conditional controls to your solution
Introduction
Would you like to update, hide or disable certain controls based on the values of other controls in the same control panel? Then add conditional controls to your solution by following these steps.
Prerequisites
- You configured the frames and routes for your solution.
- You configured the relevant contents such as the model(s), control panel(s), viewer(s) and datastore.
Hide a control conditionally
- Use the
hideWhenentity to hide ordisableWhenentity to disable the control if a condition is complied with. - The conditions can be the following:
- the value of the other control evaluates to true (see the truthyConfig schema docs)
- the value of the other control evaluates to false (see the falsyConfig schema docs)
- the value of the other control is equal to a certain value (see the equalConfig schema docs)
The configuration should look similar to the example below:
my-control-1:
  kind: Dropdown
    label: Dropdown Control
    value: 10
    choices:
      - label: Option 10
        value: 10
      - label: Option 20
        value: 20
  disableWhen: #my-control-1 is disabled when my-control-3 is true
      kind: truthy
      control: my-control-3
my-control-2:
  kind: Slider
    label: Number Slider Control
    value: 20
    min: 0
    max: 100
    precision: 3
  hideWhen: #my-control-2 is hidden when my-control-1 is equal to 20
      kind: Equal
      control: my-control-1
      value: 20
Update choices of a selection control conditionally
For selection controls:
- Use the
updateChoicesWhenentity withkind: Matchto replace the control cchoices based on the value of another control. - Define the other control that affects the choice of this controls.
- Define when and how the choices should be changed.
The configuration should look similar to the example below:
my-control-3:
  kind: Select
  itemHeight: 110
  height: 120
  label: This is my-control-3
  choices:
    - label: option-1
      value: 1
      kind: Image
      imagePath: image-1.jpg
    - label: option-2
      value: 2
      kind: Image
      imagePath: image-2.jpg
  updateChoicesWhen:
    kind: Match
    control: my-control-1
    matchValues:
      - value: 10 #if my-control-1 is set to 10, then the choices in my-control-3 will be set to those defined below
        choices:
          - label: option-1
            value: 1
            kind: Image
            imagePath: image-1.jpg
          - label: option-2
            value: 2
            kind: Image
            imagePath: image-2.jpg
      - value: 20 #if my-control-1 is set to 20, then the choices in my-control-3 will be set to those defined below
        choices:
          - label: option-3
            value: 3
            kind: Image
            imagePath: image-3.jpg
          - label: option-4
            value: 4
            kind: Image
            imagePath: image-4.jpg
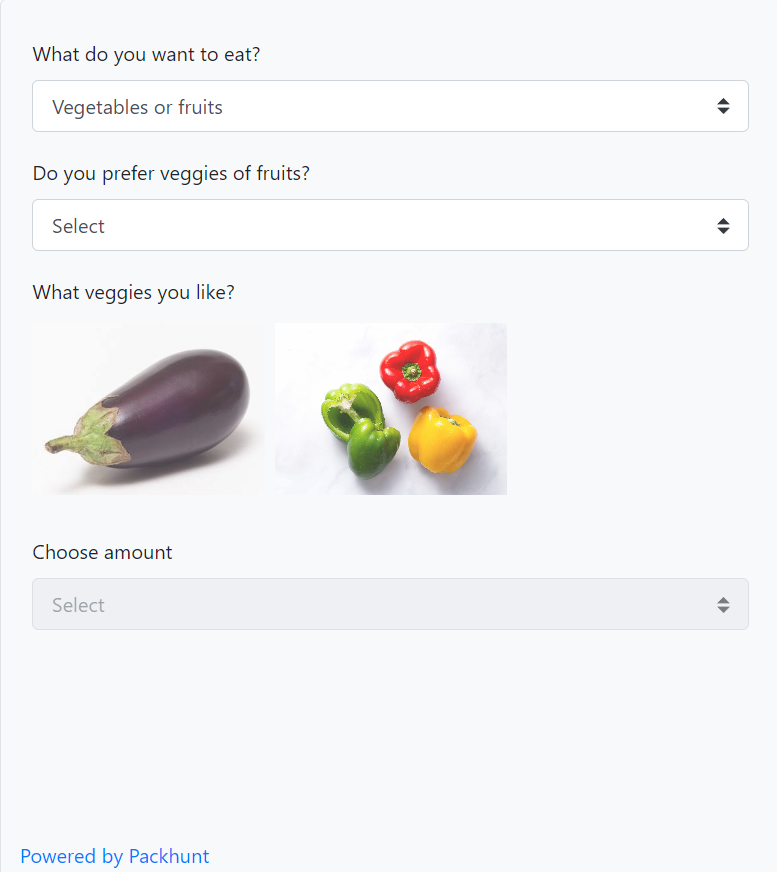
Example
- Create a file
solution.yamlfile with the decision tree example solution file content. - Save the images apples.jpg, peppers.jpg, eggplant.jpg and blueberry.jpg to your solution folder.
- Deploy using the cli:
ph deploy solution -o <org-slug> <solution-name>
The solution should look like the image below.
Schema
See the updateChoicesWhen schema docs and controlPanelConfig schema docs for more information.