Step 2: Install CLI
Introduction
To create a solution, you need to create a configuration and upload it to the Packhunt platform. To upload the solution, you need to install the tool called the “Packhunt Command Line Interface” or Packhunt CLI.
Prerequisites
- Make sure that you have completed the prerequisites.
1. Open your terminal
The CLI is executed from a terminal (the black window where you can execute text commands). We suggest using Visual Studio Code for editing configuration files and for using a terminal.
To open a terminal window in VSCode:
- In VSCode, open
Terminal>New Terminal - Select the shell, by clicking the drop-down in the top-right corner of the terminal window.
- Select
PowerShellfor Windows andbashfor Mac and Linux.
For Windows, the terminal should look like the image below.
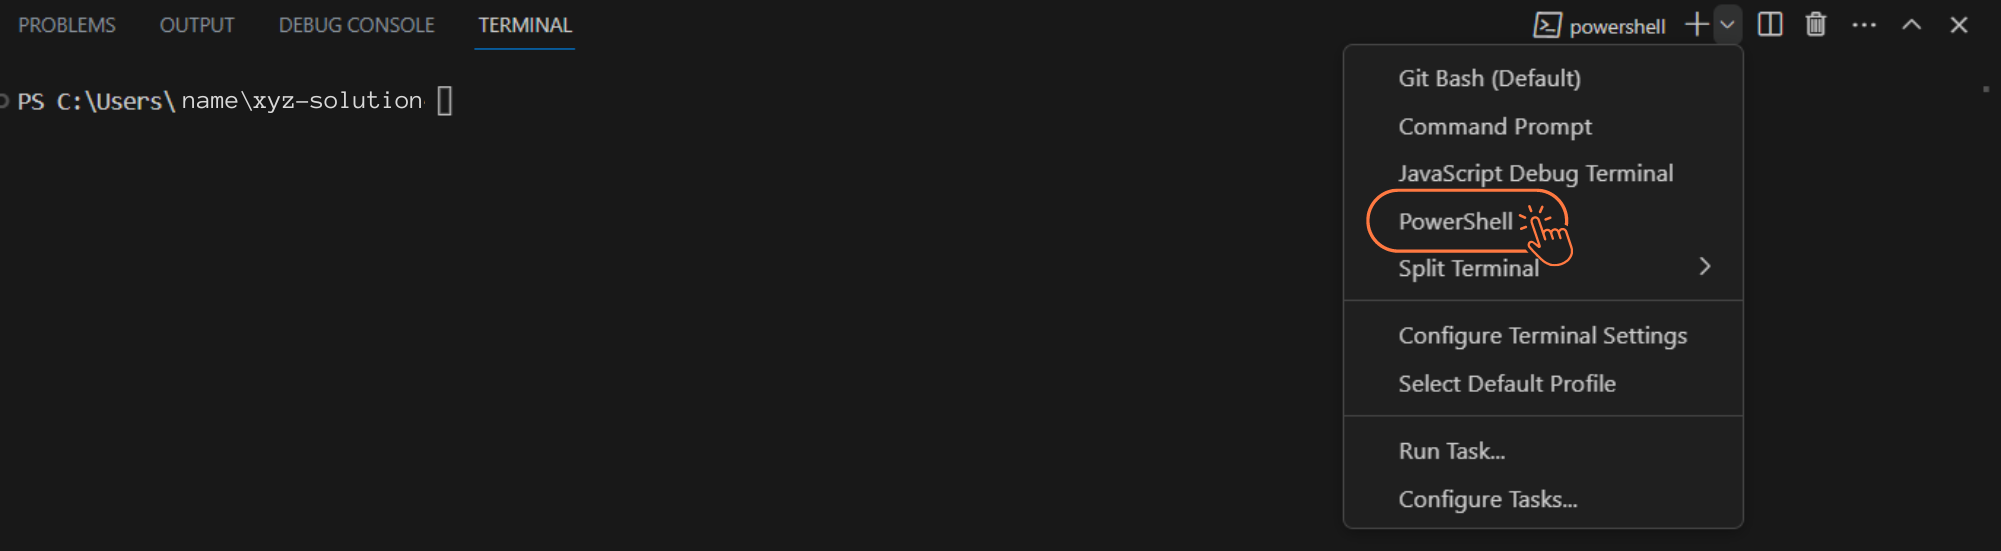
❗ Depending on your operating system, select the correct type of terminal. If you do not select the correct terminal type, subsequent commands may not work.
2. Install the Packhunt CLI
-
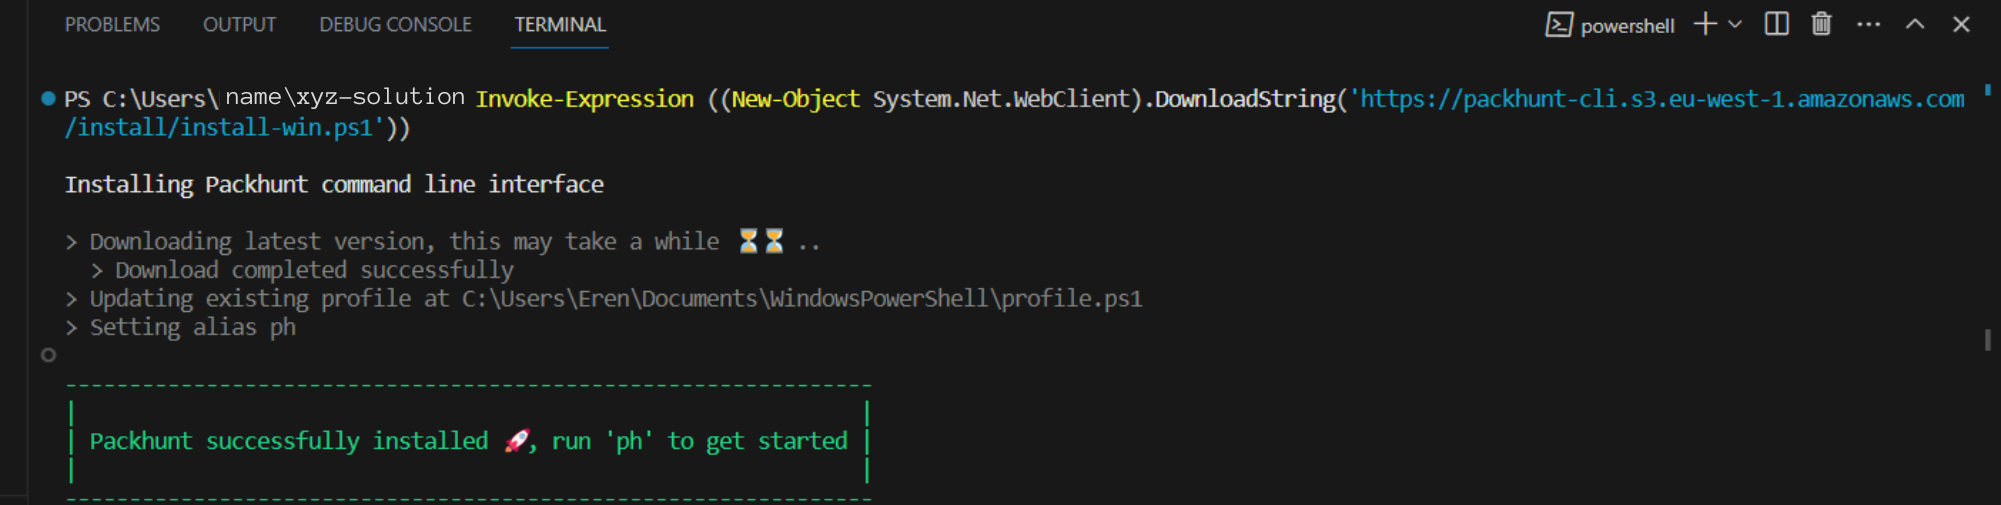
On Windows run Powershell as administrator. Execute the command to install the CLI.
Invoke-Expression ((New-Object System.Net.WebClient).DownloadString('https://packhunt-cli.s3.eu-west-1.amazonaws.com/install/install-win.ps1')) -
On MacOS, in the VSCode terminal, execute the command to install the CLI:
/bin/bash -c "$(curl -fsSL https://packhunt-cli.s3.eu-west-1.amazonaws.com/install/install-mac.sh)" -
On Linux, in the VSCode terminal, execute the command to install the CLI:
/bin/bash -c "$(curl -fsSL https://packhunt-cli.s3.eu-west-1.amazonaws.com/install/install-linux.sh)" -
Make sure you see the message:”
Packhunt successfully installed 🚀, run 'ph' to get started. This indicates that the CLI is now installed and ready for use.
3. Verify installation
To check if the CLI is correctly installed on your machine:
- Type
phin the VSCode terminal. - Run the command.
- It should return
Usage: ph [command] <options>and a list of ph commands.
Next Steps
Log in with your Packhunt account.