How to set material colours
Introduction
Would you like to display your geometry with different colours? Then set material colours by following these steps.
Prerequisites
- You configured the frames and routes for your solution.
- You configured the relevant contents such as the model(s), control panel(s), viewer(s) and datastore.
- You have a Rhino Grasshopper definition using the Packhunt data output component.
1. Define materials
To assign materials to the incoming geometries, the materials should be defined in the viewer.
-
Define your materials with
kind: StandardMaterialorkind: ColouredMeshMaterial. -
Define the material colours:
- For the StandardMaterial, use the RGB codes.
- For the ColouredMeshMaterial, define the coloured mesh and connect it to the
Data outputcomponent in Rhino Grasshopper.
💡See the guide for displaying analysis results with coloured mesh for more information.
The configuration should look similar to the example below:
  my-viewer:
    kind: Viewer
    materials:
      blurple:
        kind: StandardMaterial
        color: [42, 75, 240]
      spicy-orange:
        kind: StandardMaterial
        color: [119, 173, 238]
2. Assign materials to the geometry
Materials can be assigned to the geometries in two ways:
- In the solution.yaml file, with the
assignMaterialsentity. - In the Grasshopper definition with the
Assign materialcomponent.
To assign materials in the solution.yaml file
- Use the
assignMaterialsentity under the viewer to model subscription. - Use the incoming geometry name and assign one of the previously defined materials to it.
❗ The materials don’t need to be defined in the Rhino Grasshopper file, if this method is used.
The configuration should look similar to the example below:
  my-viewer:
    kind: Viewer
    materials:
      blurple:
        kind: StandardMaterial
        color: [42, 75, 240]
      spicy-orange:
        kind: StandardMaterial
        color: [119, 173, 238]
    subscribe:
      - kind: Model
        frame: my-home-frame
        source: my-model
        assignMaterials:
          sphere: spicy-orange
          box: blurple
To assign materials in the Grasshopper definition
- Connect the
Assign materialcomponent to your geometry. - Define the material name.
- Connect the output of the
Assign materialcomponent to theData outputcomponent.
See the image below for an example Grasshopper definition.
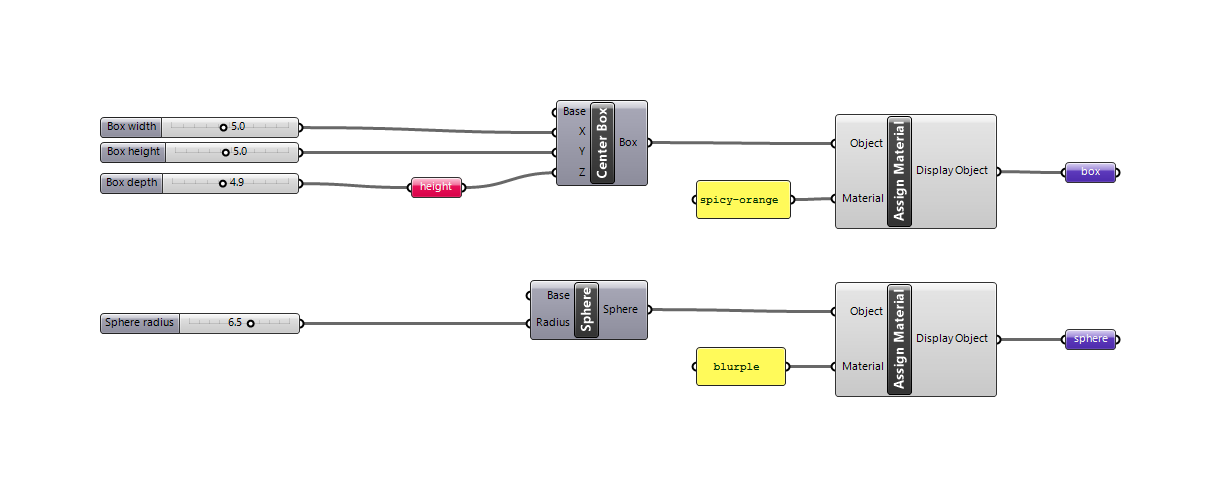
💡 If this method is preferred, the material names in the solution.yaml file and Rhino Grasshopper definition should match.
Example
For the rest of the configuration and an example Rhino Grasshopper file, see the basic example .
Schema
See the viewerconfig schema docs for more information.