How to add parametric inputs to your solution
Introduction
Would you like to have parametric inputs to change the design options? Then add controls to your solution by following these steps.
Prerequisites
- You configured the frames and routes for your solution.
- You configured the relevant contents such as the model(s), viewer(s) and datastore.
- You have a Rhino Grasshopper definition using the Packhunt input components.
1. Add a control panel
- Create a
ControlPanelwithin the relevant frame - Configure
controlsto represent your inputs. These can be:- TextInput
- Slider
- Toggle
- Dropdown
- Checkbox
- Select
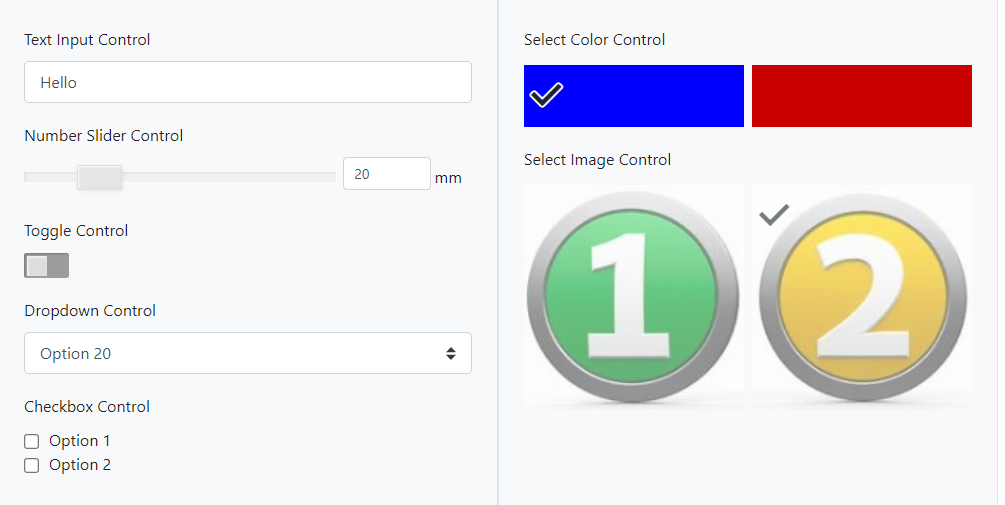
The configuration should look similar to the example below:
my-control-panel:
  kind: ControlPanel
    controls:
      my-input-1:
        kind: Slider
        label: Number Slider Control
        value: 20
        min: 0
        max: 100
        precision: 3
        unit: mm
❗ The controls name my-input-1 should match the name of the output component in the Rhino Grasshopper definition.
2. Subscribe the model to the control panel
To transfer the values set in the control panel to the model, the model should subscribe to the control panel.
- Define the subscription to the control panel under the model.
- In the subscription, specify the target frame and control panel.
The configuration should look similar to the example below:
my-model:
  kind: model
  modelFile: my-grasshopper-file.gh
  subscribe:
    kind: ControlPanel
    source: my-control-panel
    frame: home-frame
3. Subscribe the viewer to the model
To display the geometry output from the model in the viewer, the viewer should subscribe to the model. See viewerModelSubscribe schema docs for more information.
❗ For solutions with multiple frames or multiple control panels connecting to the same model, the data transfer should be through the datastore.
Example
This example illustrates how to configure different control types.
- Create a file
solution.yamlfile with the control types example solution file content. - Save the images one.jpg and two.jpg to your solution folder.
- Deploy using the cli:
ph deploy solution -o <org-slug> <solution-name>
The solution should look like the image below.
Schema
See the controlPanelConfig schema docs and modelControlPanelSubscribe schema docs for more information.