How to sketch in the viewer
Introduction
Would you like to use user-defined geometries as inputs for your Grasshopper model? Then sketch lines and polylines in the viewer by following these steps.
Prerequisites
- You configured the frames and routes for your solution.
- You configured the relevant contents such as the model(s), control panel(s), viewer(s) and datastore.
- You configured your viewer with
AdvancedSettingsand cameras.
1. Add editors to viewer
To draw and select lines and polylines in the viewer, configure editors. Editors can be used for drawing simple geometries (lines and polylines) and for selecting geometric objects.
- In the viewer, define your
editors. - There are 3 different types of editors:
- For drawing lines, use
kind: LineEditor. - For drawing polylines, use
kind: PolylineEditor. - For selecting geometries, use
kind: SelectEditor.
- For drawing lines, use
- You can define whether the editor is
enabledby default. - You can define whether multiple lines/polylines can be drawn with the
multiproperty. - To hide/show the geometries with a button click, you can assign layers to the editors. Add
applyPropertiesto your editor configuration to assignlayers.
💡 You can define which editor should be enabled by default when no other editors are enabled with the defaultEditor property.
The configuration should look similar to the example below:
my-viewer:
  kind: Viewer
  defaultEditor: my-select-editor
  editors:
    my-editor-1:
      kind: PolylineEditor
      enabled: true
      multi: true
      applyProperties:
        layers: [1] # draws on layer 1
    my-editor-2:
      kind: PolylineEditor
      enabled: false
      multi: true
      applyProperties:
        layers: [1] # draws on layer 1
    my-select-editor:
      kind: SelectEditor
      multi: true
      layers: [1] # select on layer 1
2. Subscribe model to viewer
To use the lines drawn in the viewer in your model:
- Subscribe your
Modelto theViewer. - Define
frameandsource. - Define which editors send lines/polylines to the model with the
FromGroupsproperty.
💡 The resulting model inputs are lines and polylines.
The configuration should look similar to the example below:
my-model:
  kind: Model
  modelFile: my-gh-model.gh
  subscribe:
    - kind: ControlPanel
      frame: home-frame
      source: my-control-panel-1
      action: update
    - kind: Viewer
      frame: home-frame
      source: my-viewer
      action: update
      fromGroups: [my-editor-1]
💡 You can subscribe your Model to the ControlPanel to use parametric inputs with the drawn lines. Make sure you set the action to update or set based on your solution logic.
💡 You can subscribe multiple Models to the Viewer if you have multiple editors.
3. Use the lines in Grasshopper
To use the lines drawn in the viewer for your Grasshopper definition:
- Add a Packhunt
inputcomponent to the canvas and name it with the editor name. - Use the input for your Grasshopper logic as usual.
- Output the resulting geometry and calculation results. For more information on inputs and outputs, see the guide for adding inputs guide.
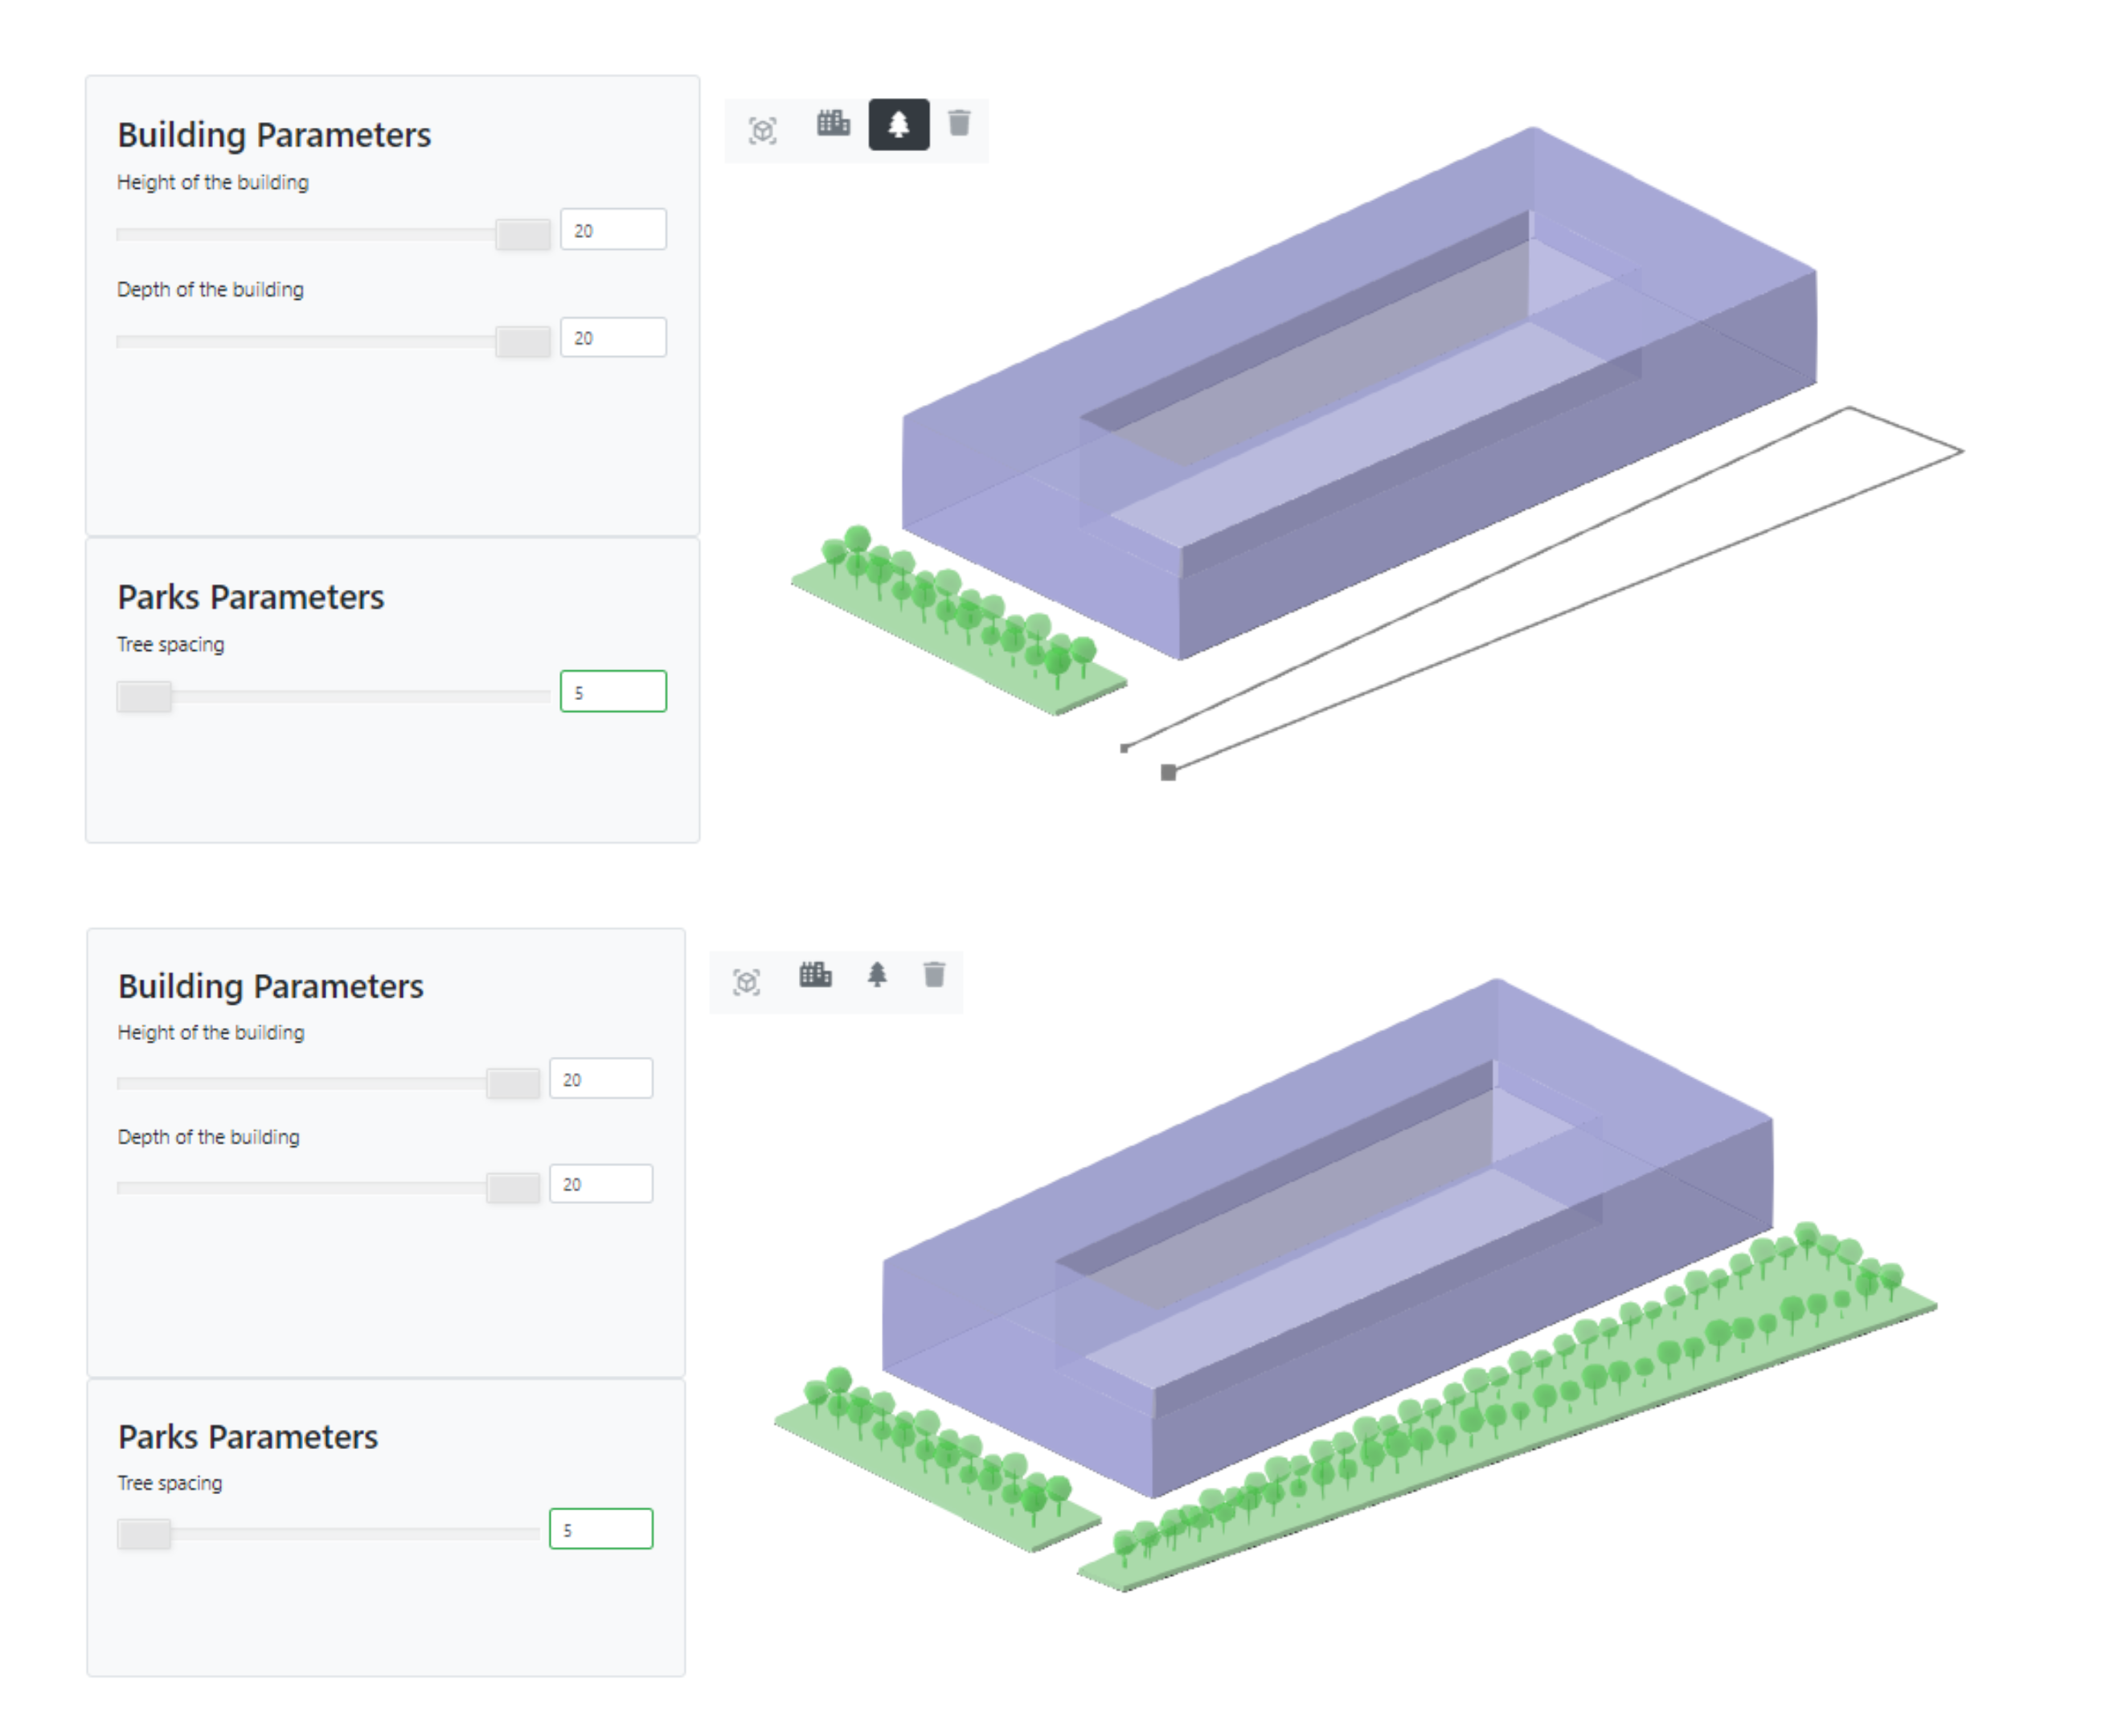
See the image below as an example.

4. Subscribe viewer to model
To visualise the resulting geometry in the viewer:
- Subscribe your
Viewerto theModel. - Define
frameandsource. - Assign materials and optionally assign layers.
The configuration should look similar to the example below:
my-viewer:
  kind: Viewer
  subscribe:
    - kind: Model
      frame: home-frame
      source: my-model
      assignMaterials:
        my-geometry-output: my-material
5. Optionally add viewer buttons
One editor can be active at a time. If there are multiple editors, add viewer buttons to enable and disable them or to allow them to delete a line.
- Under
viewerControls, define which side of the viewer you’d like to see the buttons. The options aretopRightandtopLeft. - Define the
orientationof theButtonBar. - Add a button with kind:
ToggleEditorfor enabling/disabling editors. - Add a button with
kind: DeleteSelectedfor deleting the selected line. - Add
icons to the buttons.
The configuration should look similar to the example below:
my-viewer:
  kind: Viewer
  viewerControls:
    topLeft:
      kind: ButtonBar
      orientation: horizontal
      buttons:
        - kind: ToggleEditor
          editor: my-editor-1
          icon:
            kind: Icon
            icon: fas-city
        - kind: ToggleEditor
          editor: my-editor-2
          icon:
            kind: Icon
            icon: fas-tree
        - kind: DeleteSelected
          icon:
            kind: Icon
            icon: fas-trash
6. Optionally configure mousebuttons
To draw, select, and delete lines, users need to interact with the viewer via different mouse clicks. The actions of the different mousebuttons can be configured in the viewer AdvancedSettings.
- Under your camera controls, define
mouseButtonsbehaviour. - Set the actions of the
left,middleandrightmouse buttons. The options aredolly,zoom,panandnull.
The configuration should look similar to the example below:
  cameras:
    my-pers-camera:
      kind: OrthographicCamera
      controls:
        maxAltitudeAngle: 90
        minAltitudeAngle: -90
        mouseButtons:
          left: null
          middle: dolly
          right: rotate
7. Optionally save the lines to an entity
To retrieve the drawn lines later, you can save them in an entity in the EntityDataStore .
- Configure an
EntityDataStore.- Define a property with
type: Array. The name of the property should match the Viewereditorname. - Define the
defaultvalue for the property and whether it’snullable. - Define the
itemsin the array withtype: GeometryObject.- Define the
defaultvalue for theitemsand whether it’snullable.
- Define the
- Define a property with
- Subscribe your
EntityDataStoreto theViewer.- Define the
frameandsource. - Define which viewer editor(s) to save with the
fromGroupstag. The names listed here should match the editor names configured in theViewer.
- Define the
The configuration should look similar to the example below:
  my-entity-datastore:
    kind: EntityDataStore
    properties:
      my-editor-1:
        type: Array
        default: null
        nullable: true
        items:
          type: GeometryObject
          default: null
          nullable: true
      my-editor-2:
        type: Array
        default: null
        nullable: true
        items:
          type: GeometryObject
          default: null
          nullable: true
    subscribe:
      - kind: Viewer
        frame: my-frame
        source: my-viewer
        fromGroups: [my-editor-1,my-editor-2]
      ...
See the image below as an example.
Configuration
See the viewer configuration docs, model to viewer subscription configuration docs for more information.