How to automate a calculation
Introduction
Automatically run a calculation in a web-app based on user inputs.
Prerequisites
- You followed the get started with the workbench guides.
- You configured user inputs.
- You installed the Packhunt plugin.
- Check our supported plugins and blocked components.
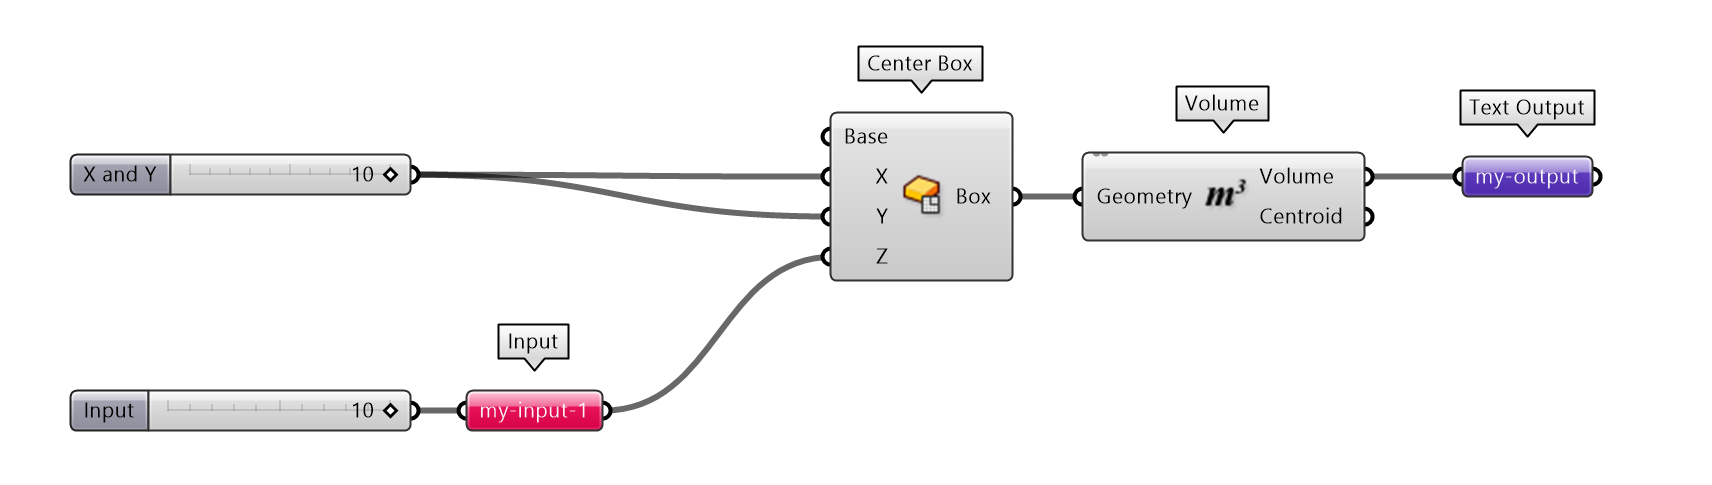
1. Prepare your calculation Grasshopper file
In order for Packhunt to run a Grasshopper file as part of a web-app, Packhunt input and output components need to be added.
- Connect
Packhunt Inputcomponents for all values that are coming from the web-app.- Give each Packhunt input component a unique name (no spaces and no captial letters).
- The component name must match the configured control name.
- Connect
Packhunt Text Outputcomponents to the calculation results.- Give each Packhunt output component a unique name (no spaces and no captial letters).
2. Add a Model block
Add a model block for the Grasshopper model.
- Add a block with kind
Modelto the frame where the model should run. - Set the
modelFileto the name of the Grasshopper file. - Save the Rhino Grasshopper file in our solution folder.
...
my-main-frame:
  kind: Frame
  contents:
    my-controlpanel: ...
    my-calculation-model:
      kind: Model
      modelFile: my-grasshopper-file.gh

3. Subscribe the Model to the ControlPanel
In order for the Grasshopper model to run with the user defined values, the Model block must receive the input data from the ControlPanel block.
- Subscribe the Model to the ControlPanel
- Set the
sourceto the name of the ControlPanel block - Set the
frameto the name of the frame in which the ControlPanel block is configured
...
my-main-frame:
  kind: Frame
  contents:
    my-controlpanel: ...
    my-calculation-model:
      kind: Model
      modelFile: my-grasshopper-file.gh
      subscribe:
        - kind: ControlPanel
          source: my-controlpanel
          frame: my-main-frame
4. Add an output control
To display the calculated value in the ControlPanel, add a new control. You can add the control to the same ControlPanel where the user inputs are or configure a new ControlPanel.
- Add a control of type
Textto the ControlPanel to display the calculated model output - Name this control to match the corresponding Grasshopper Text Output component (e.g. my-output)
...
my-main-frame:
  kind: Frame
  contents:
    my-controlpanel:
      kind: ControlPanel
      controls:
        my-input-1: ...
        my-output:
          kind: Text
          text: -/-
    my-calculation-model: ...
5. Subscribe the ControlPanel to the Model
In order to display the calculated value in the ControlPanel, the ControlPanel block must receive the calculated value from the Model block.
- Subscribe the ControlPanel block to the Model block
- Set the
sourceto the name of the Model block - Set the
frameto the name of the frame in which the Model block is configured - In the
setOutputsspecify the name of the Packhunt Text Output component and set thetypetosetText
...
my-main-frame:
  kind: Frame
  contents:
    my-controlpanel:
      kind: ControlPanel
      controls:
        my-input-1: ...
        my-output: ...
      subscribe:
      - kind: Model
        source: my-calculation-model
        frame: my-main-frame
        setOutputs:
          my-output:
            type: setText
    my-calculation-model: ...
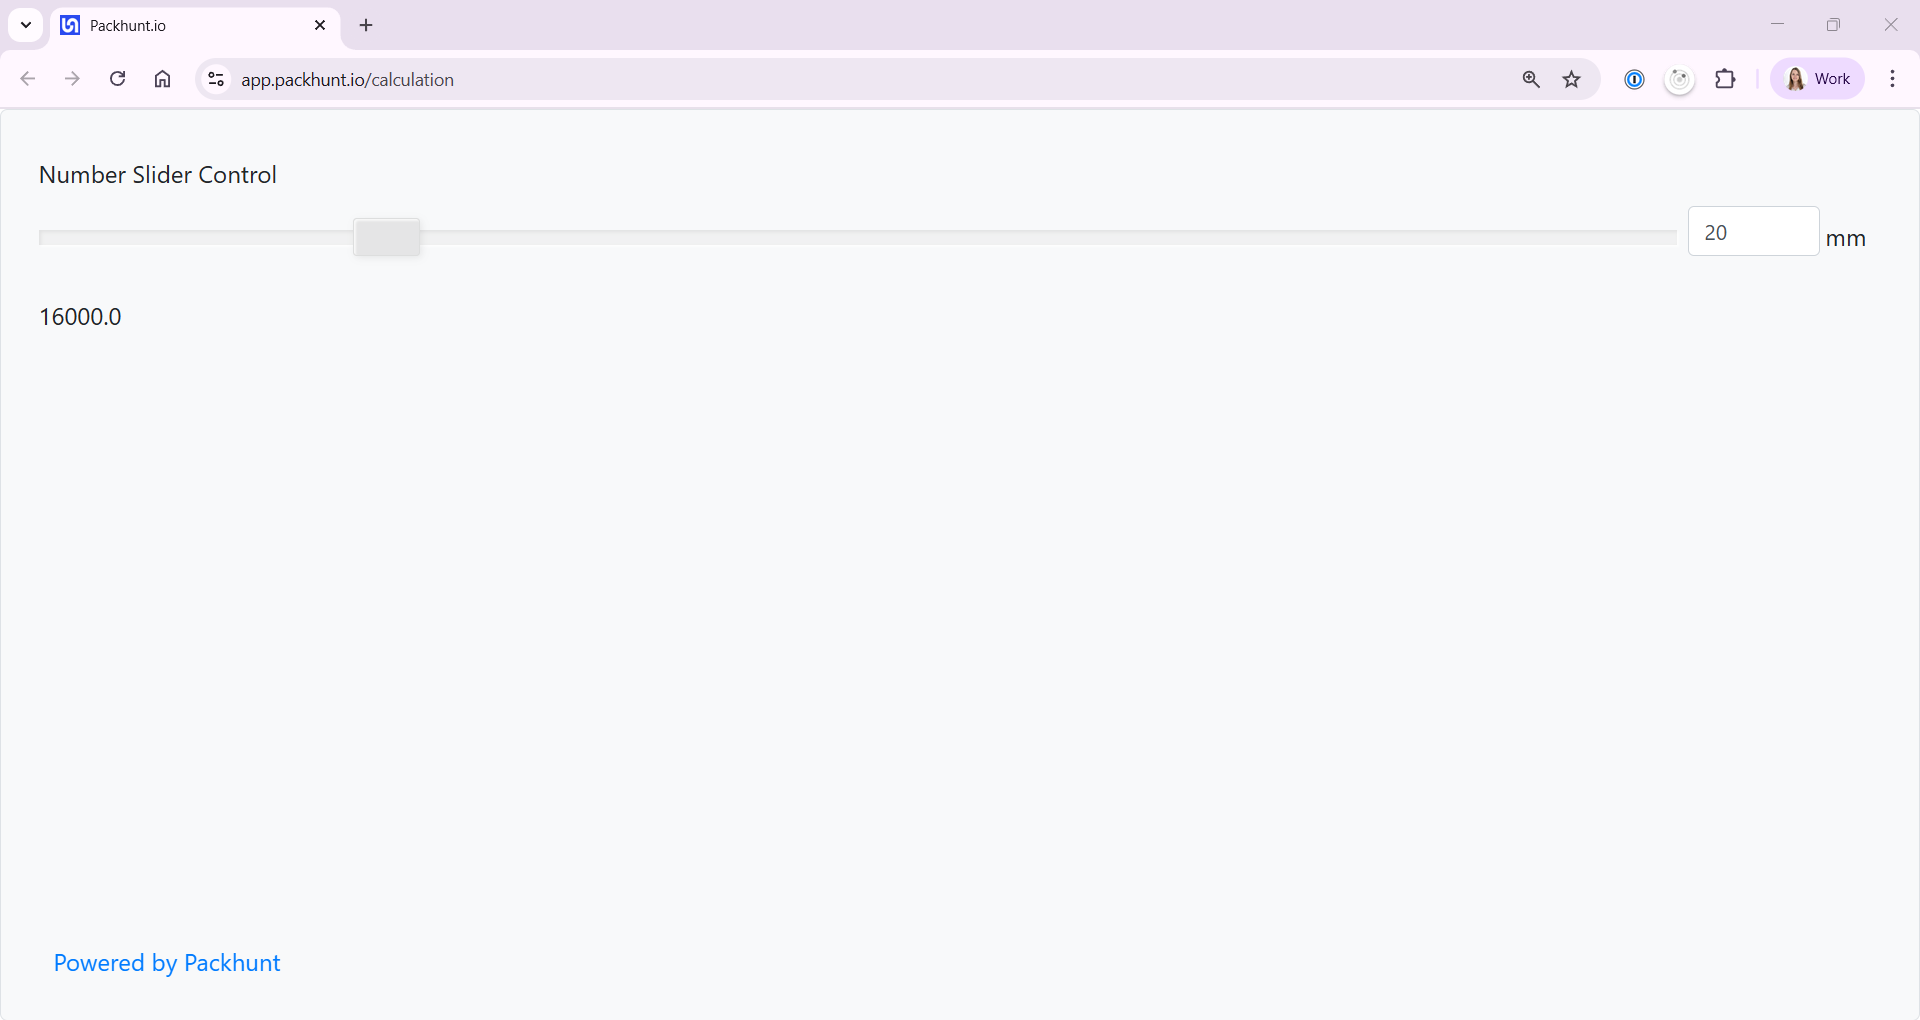
6. Deploy
- Save and deploy the solution.
- Open the web-app
- Change the slider value and notice that the calculated result is re-calculated
Configuration
See the ControlPanel block for more control options and Model block documentation for more information.
Next step
- Add a title and description to your web-app (e.g. “Results” title above the calculated value)
- Display geometry in a web viewer.