Router and frames
The router and frames allow you to define the customer journey of your web-app. The Router defines the hierarchy of the frames, while the frames define what is visible and what is happening per page or sub-page of your web-app..
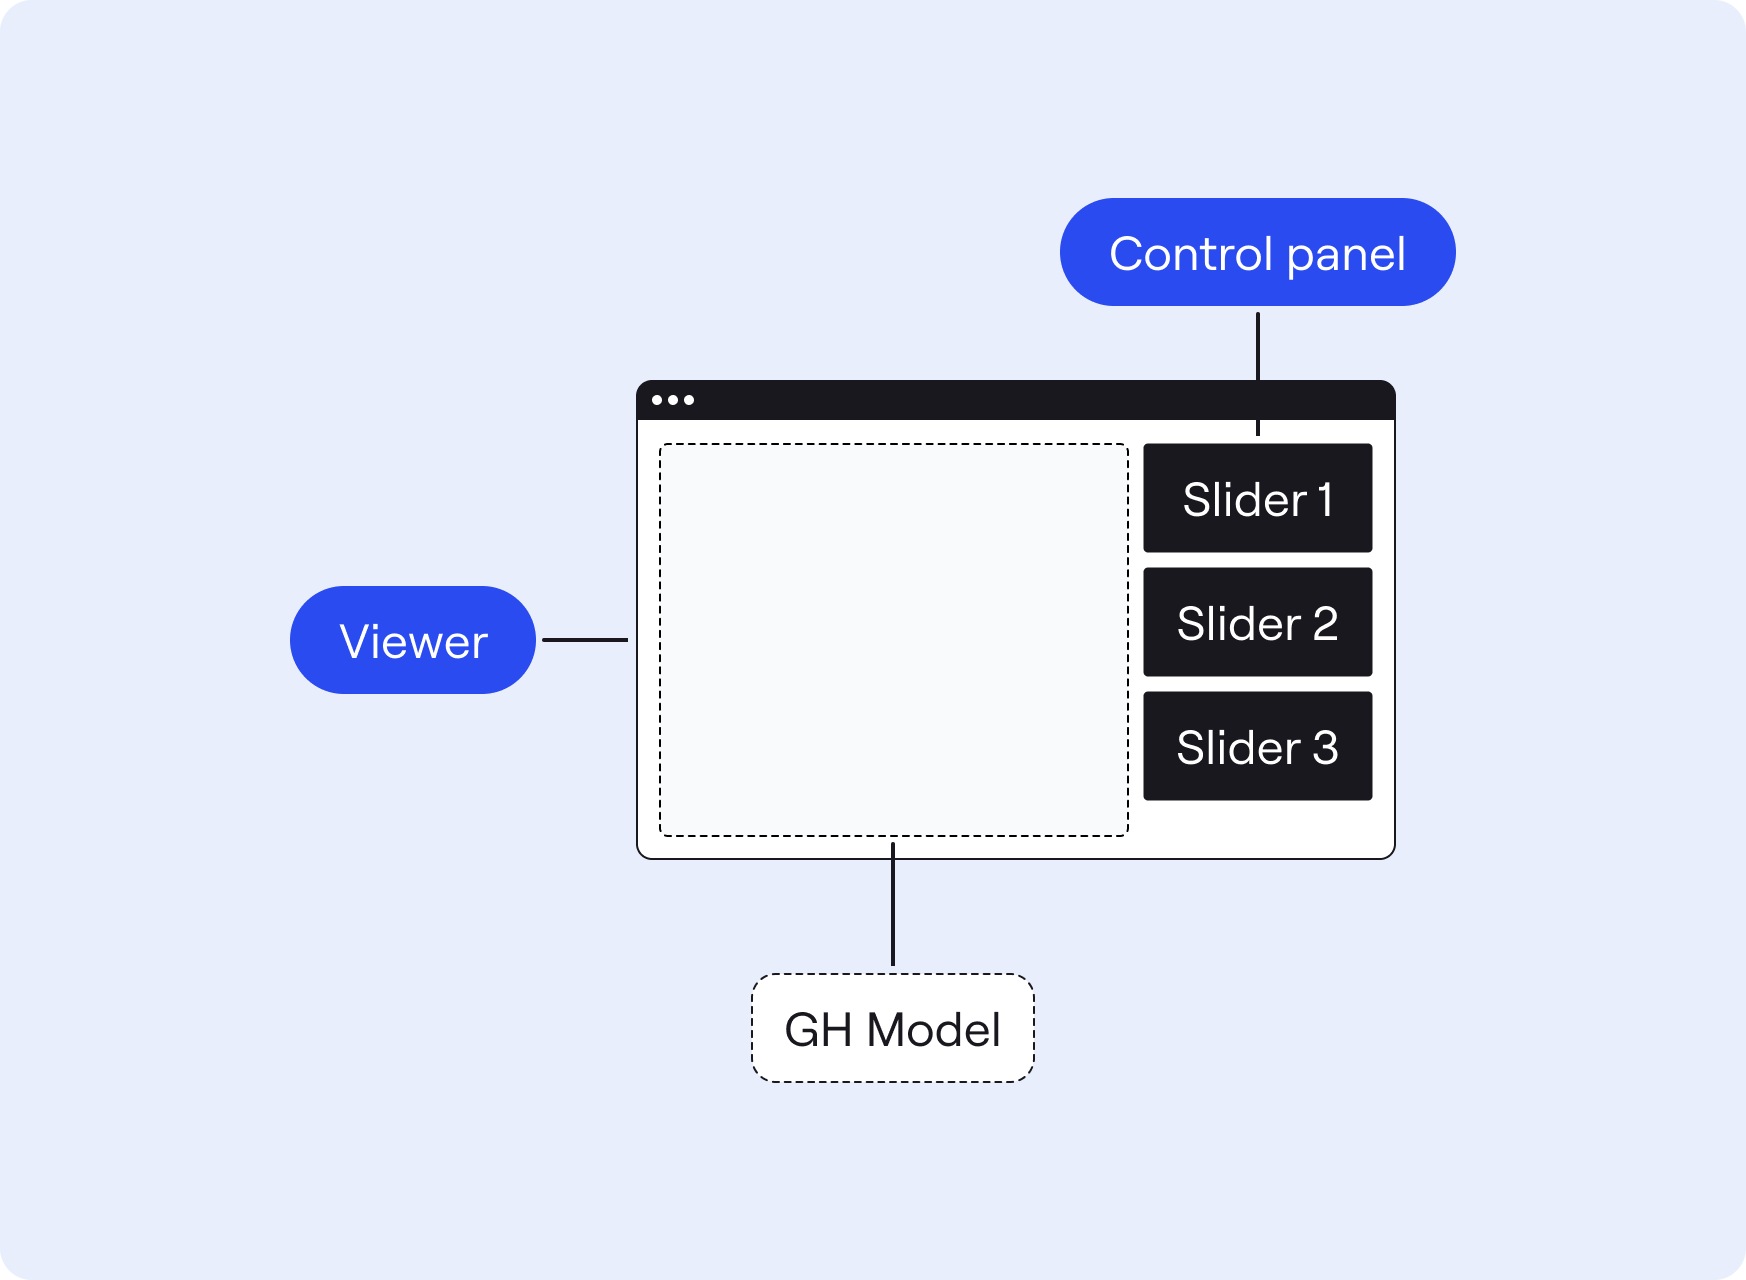
Frames are like pages or sub-pages of your web-app. You can define where a block (e.g. ControlPanel or Viewer) should be shown in the user interface via the layout and what blocks should do via subscriptions.
💡 The hierarchy of frames is very important for the communication between blocks.
Blocks can only communicate with other blocks located in frames at a higher (parent) or lower (child) position in the router hierarchy, but not in parallel frames.
The router can have parallel frames (defined right below each other) and children frames (frames nested within other frames). See below for the different situations.
Single frame
Single frames are useful when your web-app only requires a single page, meaning the shown content (blocks) remain the same.
The example below defines a router with one frame called frame-1. This results in a single frame with various blocks for the user to interact with.
  router:
  kind: Router
  routes:
    - frame: frame-1
Parallel frames
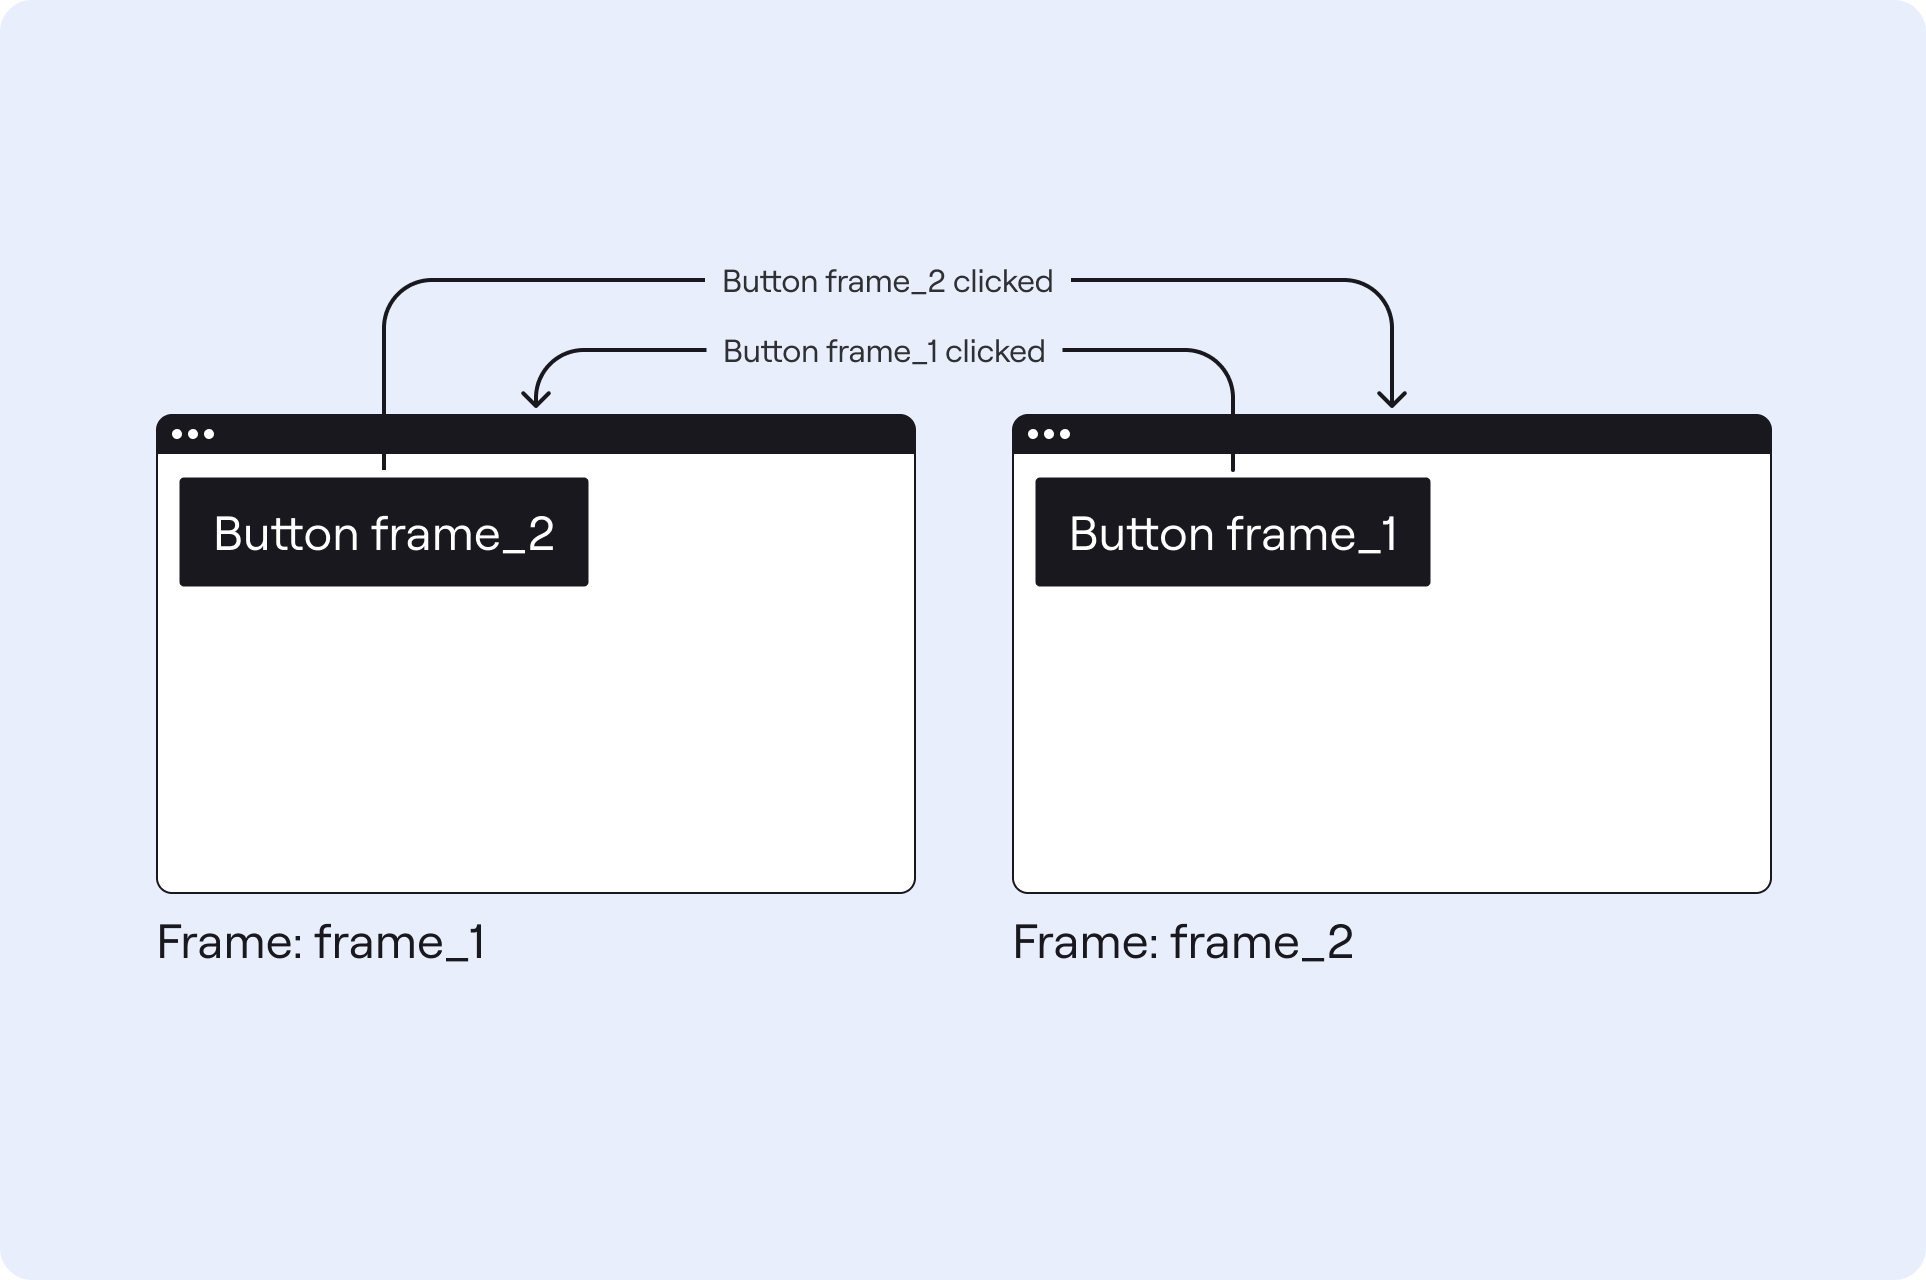
Parallel frames are useful when you want to show two or more pages with completely different content (blocks) that the user can navigate between.
The example below defines a router with two frames called first and second. These frames are defined in parallel (directly below each other).
- The top frame in the Router will always be the first frame the user sees.
- The user to switch between them via the NavPanel or Buttons with router links
/firstand/second. - When the user switches to a new frame, then (1) all the blocks in the previous (parallel) frame become inactive and (2) all the blocks in the new (parallel) frame initialize and become active.
💡 Blocks in a frame cannot communicate with blocks in other parallel frames.
  router:
  kind: Router
  routes:
    - frame: frame_1
    - frame: frame_2
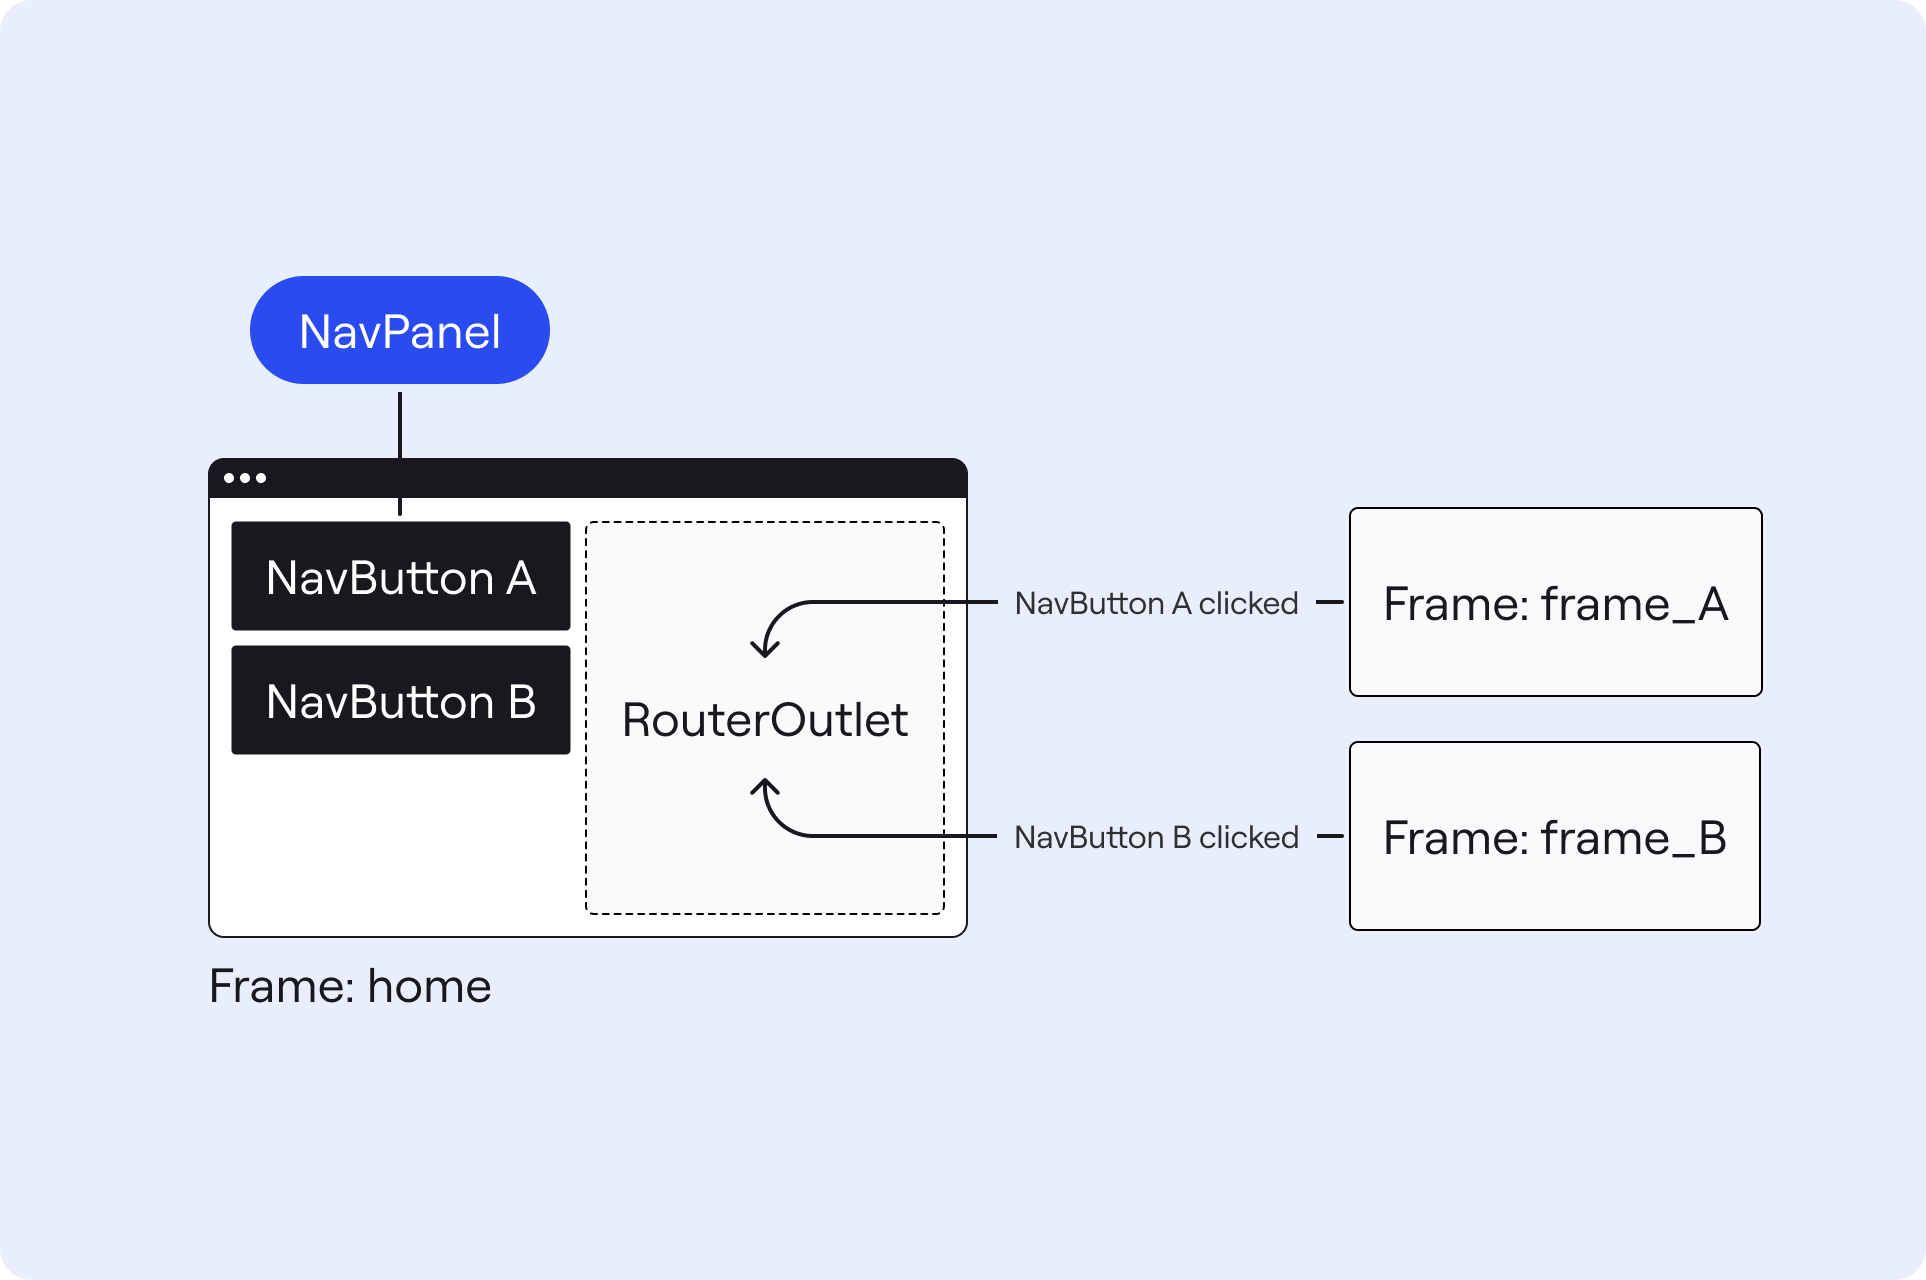
Nested frames
Nested frames are useful when you want to show different content on only part of a page. In this case you need to define a RouterOutlet and place it in the layout where you want to switching between sub-pages.
The example below defines a router with a home frame on the parent level, and two children frames nested inside, called frame-a and frame-b.
- A RouterOutlet must be placed in the layout of the parent frame (
homeframe), which will load the contents of the children frames defined in the Router. - When opening the web-app, the user will first see the contents of the home frame and frame-a.
- Then the user can switch between the children frames via a NavPanel or Buttons with router links
/home/frame-aand/home/frame-b. - When the user switches to a new child frame, then (1) all the blocks in the previous (parallel) child frame become inactive and (2) all the blocks in the new (parallel) child frame initialize and become active.
💡 Blocks in children frames can only communicate with blocks in the parent frame and the active lower (children) frame. They cannot communicate with blocks in parallel children frames.
  router:
  kind: Router
  routes:
    - frame: home
    - children:
      - frame: frame-a
      - frame: frame-b
See the router configuration and frame configuration for more information.